


Add Velo to Framer.
Install the Velo cookie banner and Google Consent Mode v2 on Framer in minutes. One line in the Start of head slot does it. If you already run Google Tag Manager, that route is on this page too.
Paste one line
at the start of head.
One line in Framer, and the banner is on every page with the Consent Mode default set before any other tag can fire. Same banner, same wiring and the same audit log as the Tag Manager route.
Already running Google Tag Manager? Take that route instead ↓
Three steps · about three minutes
-
01
Copy the line
One script tag, the same on every page of the site. Everything below is about getting it into the right place, and that place is always the head, ahead of the tags it governs.
<!-- Before your other tags. That order is the point. --> <script src="https://veloconsent.com/v1/velo.js" data-velo-site="your-site-id" defer></script> -
02
Open Site Settings → Custom Code
In the Framer editor, click the gear icon top right to open Site Settings, stay on the General tab and scroll to Custom Code. Paste the snippet into Start of <head> tag , the earliest slot Framer offers, which is what lets Velo set the consent default before any other tag, and hit Save. Custom code needs a paid site plan (Mini or higher).
framer.com · Site Settings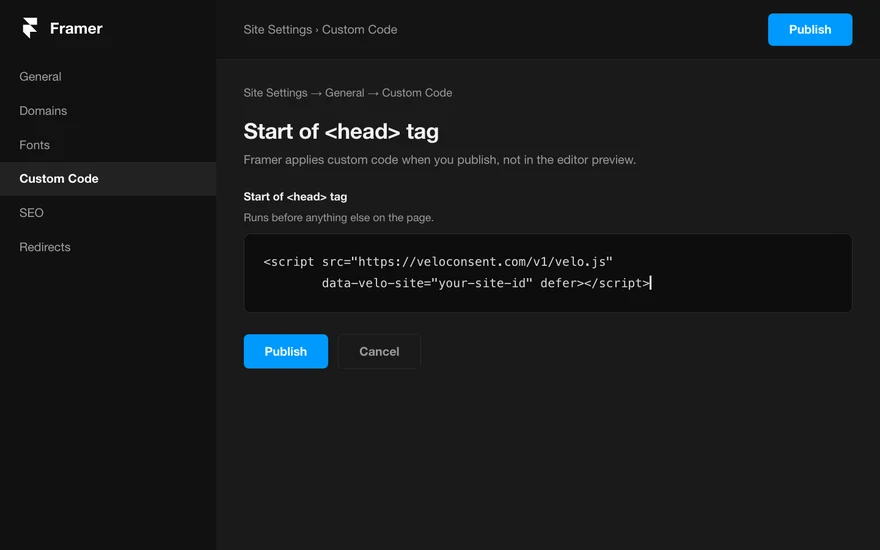
-
03
Publish the site
Framer applies custom code on publish: click Publish top right and reload the published URL. The editor preview does not run custom code. The banner renders and the Consent Mode default is set before anything else fires.
your-site.com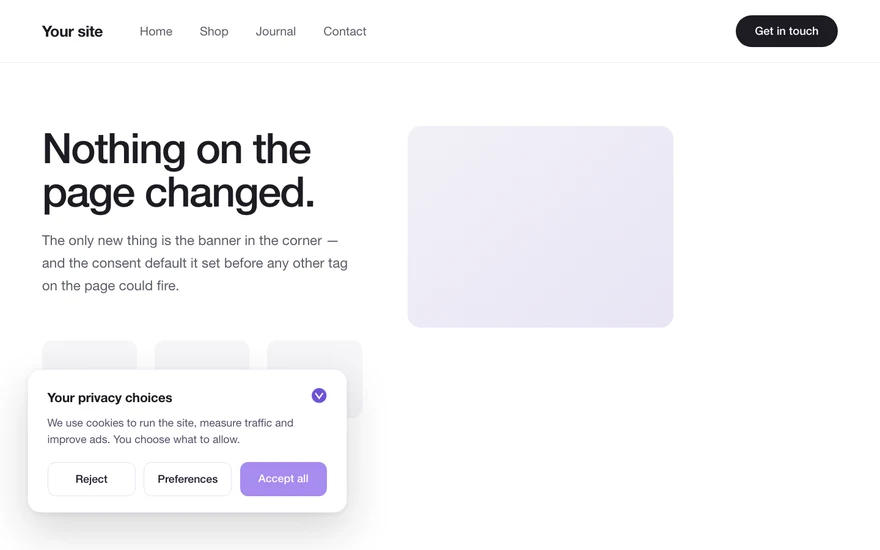
Use Start of <head> tag, the earliest slot Framer offers, so the consent default is in place before anything else loads. End of <head> works but runs later, and the body slots are never right for a consent script.
Or import the tag
in Tag Manager.
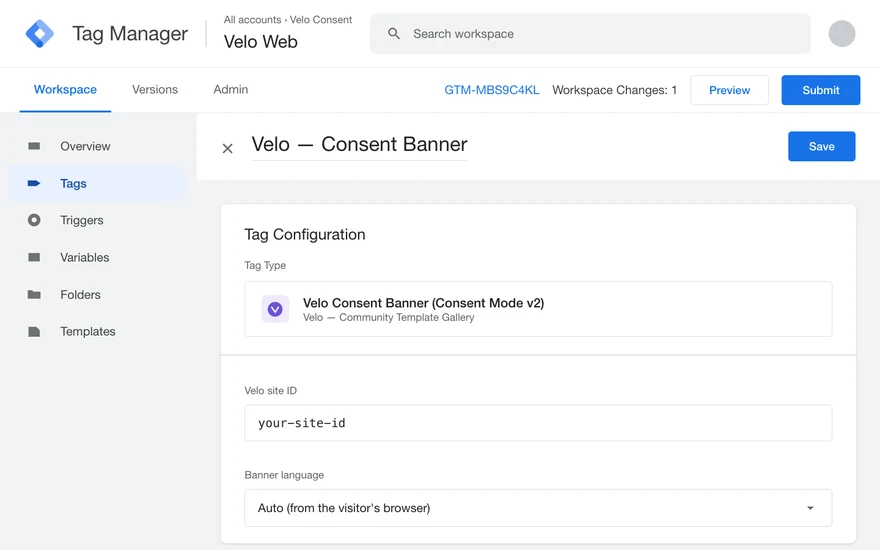
One tag, no code on the page, and your whole measurement stack stays in one place. No Tag Manager on the project yet? Paste the GTM head snippet into Start of <head> tag and the noscript into Start of <body> tag under Site Settings → General → Custom Code, publish once, then start here.
- 01Import the Velo CMP templateTemplates→Tag Templates→New→Import
- 02Create the tagTags→New→Velo CMP template
- 03Tick the two recovery optionsAdvanced→url_passthrough→ads_data_redaction
- 04Fire it on Consent Initialization – All PagesTriggering→Consent Initialization – All Pages
- 05Turn on consent overview under AdminAdmin→Container Settings→Enable consent overview
- 06Preview, then publishPreview→Submit→Publish
Framer questions,
answered.
What teams installing on Framer ask first.
Does this work on the free plan?
Custom code, including any consent tool and Google Tag Manager itself, needs a paid Framer site plan (Mini and up). Once the site has one, either method on this page takes a couple of minutes.
Which custom code slot should I use?
Start of <head> tag. It is the earliest slot Framer offers, so the consent default is in place before anything else loads. End of <head> works too but runs later; never use the body slots for a consent script.
Does it work with Framer Analytics?
Framer’s built in analytics is cookieless and unaffected. Velo governs the Google tags you add yourself, such as GA4, Google Ads, or anything routed through Tag Manager, and recovers the signal consent would otherwise cost them.
I already have a CMP embed in my project.
Remove the old embed before publishing Velo. Two banners confuse visitors, and two tools writing Consent Mode defaults send Google conflicting signals. Velo takes over the whole job in one tag.
Will it slow the site down?
No. The script loads deferred, never blocks rendering, and the visitor's region is resolved at the nearest edge before the page finishes painting. The banner itself is a few kilobytes of static code.
Can an AI assistant do this for me?
Yes. Copy the prompt in Install with agents, just below, into Claude, ChatGPT, Cursor or whichever assistant you already use. It carries the steps on this page, the order the tags have to load in, and the checks the agent has to run before it tells you the job is done.
Or hand it
to an agent.
Copy the prompt into Claude, ChatGPT, Cursor or whichever assistant you already use. It carries everything on this page: both routes, the order the tags have to load in, and the checks that prove it worked.
Paste it in as your first message, then swap your-site-id for the ID on your Velo dashboard. Everything else the agent needs is already written into it, including what to check before publishing.
Working with an agent that reads the web? Point it at veloconsent.com/llms.txt and /install.md for the same context in plain text.
From the journal.
Your banner, your consent,
your data — all in one place.
